If you love nails that catch the light and turn heads, holo nails are your next obsession! Holographic nail art has taken the beauty world by storm, offering a mesmerizing, futuristic shine that shifts colors depending on the angle. Whether you’re a nail art newbie or a seasoned pro, there’s a holo nail design for everyone—from subtle accents to full-on glitter explosions.
As someone who’s experimented with holographic polishes, powders, and gels for years, I can confidently say that holo nails are one of the most versatile trends out there. They work for any occasion—casual, glam, or even bridal! Plus, with brands like ILNP, Holo Taco, and Color Club leading the charge, achieving that perfect holographic effect has never been easier.
In this guide, we’ll dive deep into 10 stunning holo nail ideas, complete with step-by-step tutorials, expert tips, and product recommendations. By the end, you’ll be ready to rock holographic nails like a pro!
1. Classic Linear Holo Nails
What Makes Them Special?
Linear holo nails are the OG of holographic manicures. Unlike scattered holographic glitter, linear holo creates a smooth, rainbow-reflective stripe effect that looks like a beam of light on your nails. It’s sleek, futuristic, and works with almost any color, though silver, rose gold, and rainbow shifts are the most popular.
How to Achieve the Look
- Prep Your Nails – File, buff, and apply a base coat.
- Apply a Black or Dark Base – A dark background (black, navy, or deep purple) makes the holo effect pop.
- Use a Linear Holo Polish – Brands like Holo Taco’s “Solar Unicorn Skin” or ILNP’s “Mega” series give the best results.
- Seal with a Glossy Top Coat – This enhances the shine and prevents chipping.
Common Mistakes & Fixes
- Patchy Application? Some linear holos need two thin coats for full opacity.
- Not Shifting Enough? Try applying over a jet-black gel base for maximum reflectivity.
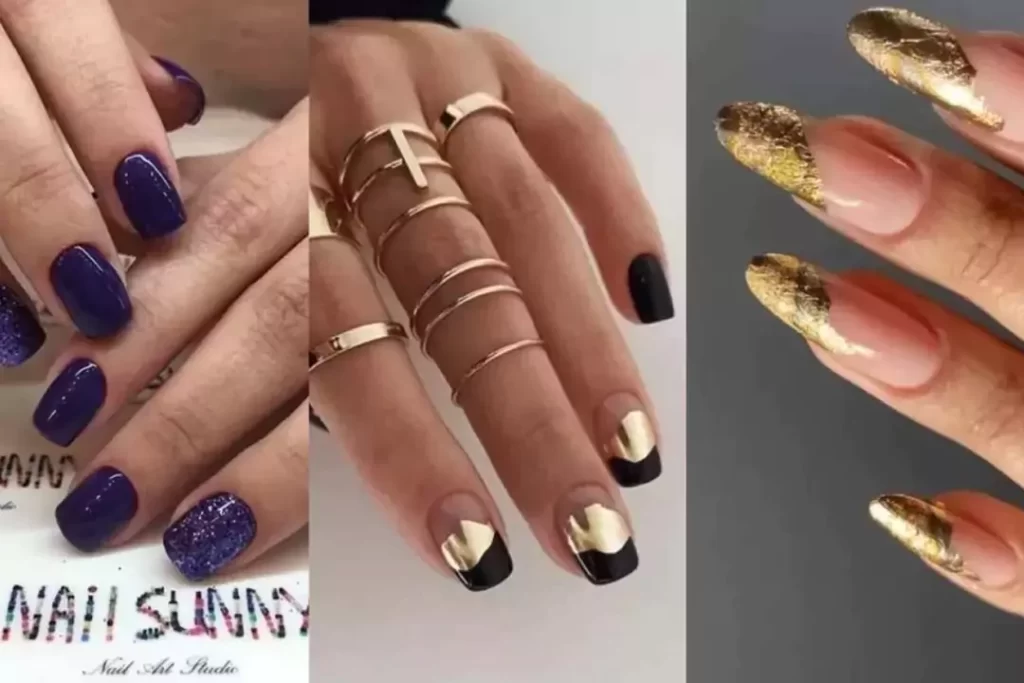
2. Holo French Tips
A Modern Twist on a Classic
Who says French tips have to be boring? Holo French tips take the traditional white tip and give it a dazzling upgrade. The best part? You can customize them—go for rainbow tips, silver holo, or even ombré holographic fade.
Step-by-Step Guide
- Paint Your Base – Use a nude, pink, or clear base for a classic look.
- Create the Tips – With a thin brush or nail guide stickers, paint the tips with holographic polish (or apply holo powder over a sticky base).
- Blend for Ombré (Optional) – Use a sponge to softly fade the holo effect downward.
- Top Coat – Lock in the shine with a high-gloss sealer.
Pro Tip
For extra drama, try double holo tips—one thin line of silver holo and a thicker one in rainbow!
3. Galaxy Holo Nails
Cosmic Nails with a Holographic Twist
Galaxy holo nails combine deep space vibes with sparkling holographic flakes. Imagine a midnight sky with bursts of rainbow stardust—that’s the magic of this design!
How to Create Them
- Start with a Dark Base – Black, navy, or deep purple works best.
- Add Nebula Effects – Use a sponge to dab on blues, purples, and pinks.
- Press on Holo Flakes – Apply iridescent glitter or holo chrome powder in random patches.
- Finish with Star Decals – Tiny silver stars or dotting tool-made constellations complete the look.
Troubleshooting
- Glitter Too Chunky? Use fine holographic dust for a smoother galaxy effect.
- Colors Too Muddy? Let each layer dry before sponging the next.
4. Holo Ombré Nails
The Perfect Gradient Glow
Why choose between color and holographic shine when you can have both? Holo ombré nails blend a solid base (like black or pink) into a radiant holographic fade.
Step-by-Step Tutorial
- Paint Your Base Color – Choose a bold shade (red, blue, or black).
- Sponge On the Holo – Dip a makeup sponge in holographic polish and dab it onto the tips, blending upward.
- Buff for Smoothness – If using holo powder, buff it gently over the gradient.
- Top Coat – A glossy finish ensures seamless blending.
Best Color Combos
- Black → Silver Holo (Edgy & futuristic)
- Baby Pink → Rose Gold Holo (Soft & romantic)
5. Chunky Holo Glitter Nails
For Maximum Sparkle Lovers
If you want bling that can be seen from space, chunky holo glitter nails are for you. This style uses large holographic glitter flakes for a bold, textured look.
How to Apply
- Base Coat – Clear or colored (glitter hides imperfections well).
- Press Glitter onto Wet Polish – Use a glitter adhesive or apply it while the polish is tacky.
- Fill Gaps with Loose Glitter – For full coverage.
- Seal with Thick Top Coat – Prevents roughness.
Pro Trick
For a smoother finish, layer the gel top coat and cure under a UV lamp.
6. Holo Chrome Nails
Mirror-Like Shine with a Holographic Twist
If you love mirror nails but want extra dimension, holo chrome nails are your best bet. This style gives you that high-shine metallic look with a subtle rainbow shift—perfect for a futuristic, high-fashion manicure.
Step-by-Step Guide
- Start with a Smooth Base – Buff nails to remove ridges, then apply a sticky base gel (no-wipe top coat works best).
- Apply Chrome Powder – Use a silicone applicator to rub holographic chrome powder (like Born Pretty’s Holo Chrome Powder) in one direction.
- Buff for Extra Shine – Gently buff with a clean brush for maximum reflectivity.
- Seal with a Non-Wipe Top Coat – This prevents dulling.
Common Mistakes & Fixes
- Powder Not Sticking? Your base coat might not be tacky enough—use a no-wipe gel top coat before applying powder.
- Streaky Finish? Apply powder in light, even strokes rather than pressing too hard.
7. Minimalist Holo Accent Nail
Subtle Yet Stunning
Not ready for full-on holographic madness? A single holo accent nail adds just the right amount of sparkle without being overwhelming. This is perfect for work settings or when you want a sophisticated yet eye-catching look.
Design Ideas & Application
- Holo Half-Moon – Use hole reinforcement stickers to create a crescent shape at the base, then fill with holo polish.
- Single Holo Stripe – Apply a thin striping tape, paint over with holo polish, then peel off for a clean line.
- Tiny Holo Dots – Use a dotting tool to place small holographic dots on one nail.
Pro Tip
For a modern minimalist look, pair a nude base with a silver holo stripe—simple but striking!
8. Holo Floral Nail Art
Romantic & Ethereal
Combine delicate floral designs with holographic accents for a dreamy, feminine look. The contrast between soft petals and shimmering holo details creates a stunning 3D effect.
How to Achieve It
- Paint a Holographic Base – Use a soft linear holo polish (like pastel pink holo).
- Add Hand-Painted Flowers – Use a thin brush to paint roses, daisies, or abstract petals in white or metallic.
- Outline with Holo – Trace some petals with fine holo glitter polish for extra dimension.
- Top with a Glossy Coat – Keeps the design intact.
Best Color Combos
- Lavender Holo + White Florals (Elegant & soft)
- Black Holo + Red Roses (Edgy romance)
9. Geometric Holo Nails
Sharp, Modern & Eye-Catching
For those who love clean lines and bold shapes, geometric holo nails are a must-try. Think triangles, negative space, and color-blocking with holographic accents.
Step-by-Step Tutorial
- Start with a Neutral Base – Nude, white, or black works best.
- Use Nail Tape for Sharp Lines – Create triangles, squares, or zig-zags.
- Fill Sections with Holo Polish – Alternate between solid color and holo for contrast.
- Peel Off Tape & Seal – A quick-dry top coat prevents smudging.
Pro Design Hack
For an ultra-modern look, try asymmetrical holo lines—one diagonal stripe on each nail in rainbow holo.
10. Holo Stiletto Nails
Edgy, Long & Dripping in Holographic Shine
If you love dramatic nail shapes, stiletto nails in full holographic glory are a showstopper. The elongated shape makes the holo effect even more mesmerizing as it catches the light from every angle.
How to Get the Look
- Shape & Extend – File nails into sharp stilettos or use press-ons/acrylics.
- Apply a Solid Base – Black or deep blue makes the holo pop.
- Layer on Holo Polish or Powder – For maximum shine, use gel-based holo polish.
- Seal with a High-Gloss Top Coat – Adds durability and extra dimension.
Styling Tips
- Pair with matte black accents (like one matte nail) for contrast.
- Try ombre holo stilettos—dark at the base, fading to rainbow at the tips.
How to Make Holo Nails Last Longer
Holographic manicures can chip faster if not done properly. Here’s how to keep them flawless:
✔ Prep Well – Buff nails, use a dehydrator, and apply a sticky base coat.
✔ Avoid Harsh Chemicals – Wear gloves when cleaning.
✔ Refresh Shine – Apply a new layer of top coat every few days.
Best Holographic Nail Products
- Polishes: Holo Taco, ILNP, Color Club
- Powders: Born Pretty, Makartt
- Budget-Friendly: Sally Hansen Miracle Gel (in holographic shades)
Final Thoughts
Whether you’re into subtle shimmer or full-on holographic glam, there’s a holo nail design for every mood and occasion. From classic linear holos to edgy stiletto nails, the possibilities are endless.
Which design will you try first? Let us know in the comments—and don’t forget to tag your holo nail looks on social media!