Marble nails are one of the hottest trends in nail art right now—and for good reason! Inspired by the natural swirls and veins of real marble stone, this design is effortlessly elegant, versatile, and oh-so-chic. Whether you’re heading to a wedding, a night out, or just want to add a touch of sophistication to your everyday look, marble nails are the perfect choice.
As a nail art enthusiast with years of experience, I’ve experimented with countless techniques—from water marbling to hand painting and even nail wraps. Trust me, once you try this trend, you’ll be hooked! In this guide, I’ll walk you through 10 stunning marble nail ideas, complete with step-by-step tutorials, expert tips, and troubleshooting advice to help you avoid common mistakes.
So, are you ready to transform your nails into miniature works of art? Let’s dive in!
1. Classic Black & White Marble Nail
The Timeless Elegance of Monochrome
There’s a reason black and white marble nails never go out of style—they’re sleek, sophisticated, and go with absolutely everything. This design mimics the natural contrast of marble stone, with soft gray swirls blending into deep black veins.
How to Achieve the Look
- Prep Your Nails – Start with a clean base, buffed and shaped (almond or coffin nails work best for this look).
- Base Coat – Apply a sheer white or light gray polish as your base.
- Create the Marble Effect – Using a thin brush or a dotting tool, drag black polish in irregular, wispy strokes. Pro tip: Add a drop of acetone to thin the polish for smoother blending.
- Seal the Design – Finish with a glossy top coat for that polished stone effect.
Expert Tip
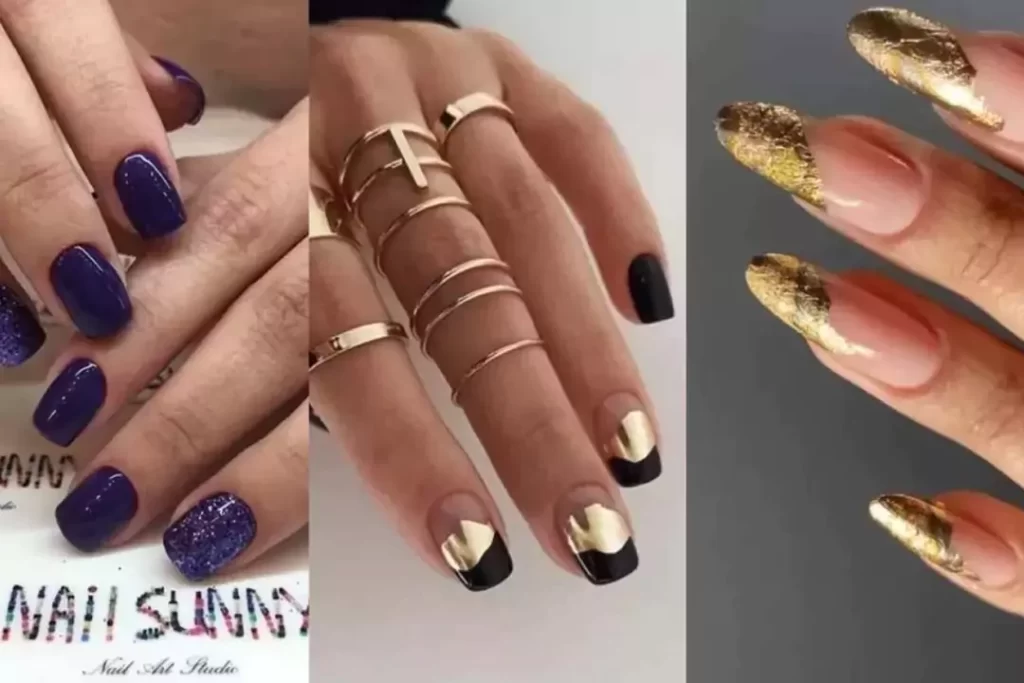
For extra glam, add gold foil accents along the veins. This subtle touch elevates the design, making it perfect for formal events.
Common Mistake: Overloading the brush with polish, leading to thick, unnatural lines. Solution: Use minimal product and build up the design gradually.
2. Pink & Gold Marble Nail
Feminine Glam with a Luxurious Twist
If you love soft, romantic nails with a touch of luxury, pink and gold marble nails are for you. This design blends delicate pink shades with shimmering gold veins, creating a dreamy, high-end look.
Step-by-Step Guide
- Base Color – Paint your nails with a soft ballet pink or rose quartz shade.
- Gold Veining – Using a striping brush, lightly drag gold metallic polish in delicate, uneven lines.
- Blend Gently – While the gold is still wet, use a clean brush to softly blend the edges for a natural marble effect.
- Top Coat – A glossy finish enhances the metallic shine, while a matte top coat gives a modern, velvety look.
Perfect For:
- Bridal nails
- Valentine’s Day
- Date night
Pro Tip: If freehand painting feels tricky, try gold nail stickers for precise, effortless detailing.
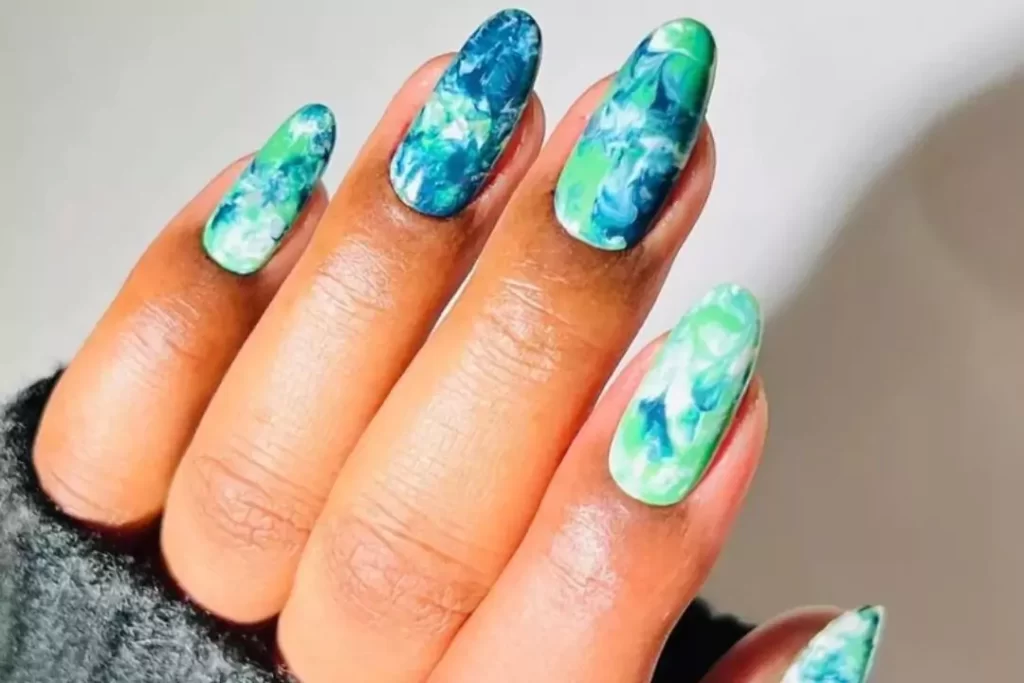
3. Blue Swirl Marble Nail
Ocean-Inspired Elegance
Nothing says “relaxing vacation” like blue marble nails. This design mimics the tranquil waves of the sea, blending different shades of blue for a mesmerizing effect.
How to Create It
- Base Layer – Start with a sheer sky blue or teal polish.
- Water Marbling Technique – Drop navy, cobalt, and aqua polish into water, then swirl with a toothpick before dipping your nail.
- Add Depth – For extra dimension, dab on a bit of white polish to mimic natural marble streaks.
- Seal with Gloss – A high-shine top coat makes the colors pop.
Common Mistake: Air bubbles form during water marbling. Fix: Use room-temperature water and work quickly.
4. Green Marble Nail with Gold Leaf
Nature Meets Luxury
Deep emerald or sage green marble nails paired with gold leaf create a rich, opulent look, perfect for fall and winter.
Tutorial
- Base Coat – Apply a deep forest green polish.
- Gold Leaf Application – Press small pieces of gold leaf onto wet polish using tweezers.
- Marble Veins – Use a thin brush to add white or lighter green swirls.
- Final Touch – Seal with a matte top coat for a modern twist.
Best Nail Shape: Oval or stiletto for maximum drama.
5. Red & Black Gothic Marble Nails
Bold and Dramatic Statement
For those who love a darker, edgier aesthetic, red and black marble nails create a striking gothic vibe. This design combines deep blood-red with inky black swirls, perfect for making a dramatic statement.
Step-by-Step Creation
- Base Preparation – Apply two coats of a rich burgundy or crimson polish as your base.
- Creating the Marble Effect – Using a fine liner brush, carefully paint thin black veins in irregular patterns. The key is to keep the lines organic—think jagged lightning bolts rather than perfect curves.
- Blending – While the black polish is still wet, use a clean brush dipped in acetone to slightly smudge the edges for a natural marble appearance.
- Adding Embellishments – For extra edge, place small rhinestones or metal studs near the cuticle area.
- Finishing Touch – A high-gloss top coat intensifies the colors, while a matte top coat gives a velvety, modern finish.
Perfect For:
- Halloween parties
- Alternative fashion lovers
- Evening events where you want to stand out
Pro Tip: If freehand painting feels intimidating, try using a black nail art stamping plate with marble patterns for a crisp, professional look.
Common Mistake: Using too much black polish, which can overwhelm the design. Solution: Start with thin lines and gradually build up the intensity.
6. Purple Haze Marble Nails
Dreamy and Mystical Vibes
Purple marble nails offer a magical, ethereal look, perfect for those who love fantasy-inspired styles. By blending lavender, lilac, and deep plum, you can create a mesmerizing galaxy-like effect.
How to Achieve This Look
- Base Color – Start with a soft lilac or pastel purple base coat.
- Layering Colors – Using a makeup sponge, dab on darker purple and white polish to create a cloudy, marbled texture.
- Chrome Accents – For a futuristic twist, press holographic chrome powder onto the tacky base before sealing.
- Final Details – Add tiny silver glitter specks to mimic stars in a twilight sky.
Best Occasions:
- Music festivals
- Cosplay events
- Romantic evening looks
Expert Advice: To prevent the sponge from absorbing too much polish, apply the colors directly onto the sponge in thin layers rather than dipping it into the bottle.
7. Neutral Beige & Brown Marble Nails
Minimalist and Office-Appropriate
For a subtle yet sophisticated look, neutral marble nails in beige and brown tones are ideal. This design mimics natural stone, offering an understated elegance that works perfectly in professional settings.
Tutorial
- Base Coat – Apply a creamy beige or soft taupe polish.
- Marble Veins – Use a thin brush to paint delicate brown streaks, keeping the lines soft and wispy.
- French Tip Variation – For a modern twist, add a white marble French tip using the same swirling technique.
- Finish – A matte top coat enhances the stone-like texture, while gloss gives a polished finish.
Why It Works:
- Complements all skin tones
- Grows out gracefully
- Pairs well with any outfit
Common Mistake: Making the veins too dark or thick. Fix: Dilute brown polish with a drop of clear coat for softer, more natural-looking lines.
8. Rainbow Marble Nails
Playful and Vibrant Artistry
Why stick to one color when you can have them all? Rainbow marble nails are a fun, eye-catching way to showcase your creativity. This design blends pastel or neon hues in a swirling, watercolor-like pattern.
Step-by-Step Guide
- White Base – Start with an opaque white base to make colors pop.
- Color Application – Using a small brush, paint random patches of pink, blue, yellow, and purple.
- Blending – While the polish is wet, gently drag a toothpick through the colors to create soft swirls.
- Sealing – A glossy top coat smooths the surface and intensifies the colors.
Best For:
- Pride celebrations
- Summer vacations
- Artistic nail lovers
Pro Tip: If working with multiple colors feels messy, try colored acrylic paints—they’re easier to blend and clean up.
9. Gray & Silver Marble Nails
Sleek and Modern Aesthetic
For a chic, futuristic look, gray marble nails with silver accents are a perfect choice. This design is minimalist yet striking, making it ideal for both professional and evening wear.
How to Create It
- Base Shade – Paint nails with a cool-toned gray polish.
- Silver Veins – Using metallic silver polish, paint thin, jagged lines across each nail.
- Geometric Add-Ons – For extra edge, use striping tape to create sharp angles before applying top coat.
- Finish – A mirror-effect top coat enhances the metallic shine.
Why You’ll Love It:
- Looks expensive with minimal effort
- Matches any jewelry or outfit
- Gives an edgy yet polished vibe
Common Mistake: Overloading nails with silver, making them look messy. Solution: Keep silver accents sparse and asymmetrical.
10. Glow-in-the-Dark Marble Nails
The Ultimate Party Trick
Why settle for ordinary when your nails can glow? Glow-in-the-dark marble nails are a fun, unexpected twist on the trend—perfect for concerts, raves, or Halloween.
Step-by-Step Tutorial
- White Base – Apply a bright white polish to maximize the glow effect.
- Marble Design – Use black or neon polish to create bold swirls.
- Glow Layer – Paint over the design with glow-in-the-dark polish (or mix glow powder into clear polish).
- Charge & Shine – Expose nails to bright light before heading out for maximum luminosity.
Pro Tips:
- For best results, use UV-activated glow polish
- Layer glow polish over dark colors for a “hidden design” effect
- Combine with blacklight neon for an extra-popular party look
Final Thoughts
From classic black-and-white elegance to daring glow-in-the-dark designs, marble nails offer endless possibilities to match any style or occasion. Whether you’re a beginner or a seasoned nail artist, these techniques can be adapted to suit your skill level.
Which design will you try first? Experiment with colors, finishes, and embellishments to make each look your own. Don’t forget to tag your marble nail creations online—I’d love to see your masterpieces!
For more inspiration, check out nail artists like Betina Goldstein and Miss Pop, or browse Nail It! Magazine for the latest trends.
Now go forth and rock those marble nails with confidence! 💅