Ever caught yourself scrolling through Pinterest at midnight, wondering why your manicure never quite matches the energy of your Fourth of July outfit? You’re not alone. Every year, right around late June, my DMs and salon bookings absolutely explode with one question: “What nails should I get for the 4th?” And honestly, I get it — between the fireworks, the backyard barbecues, the white dresses, and the family photos, your hands are on display more than you’d think on Independence Day.
I’ve spent years behind the nail desk, painting everything from simple red tips to wildly detailed flag art, and if there’s one thing I’ve learned, it’s this: patriotic nails don’t have to be cheesy or one-note. Done right, a Fourth of July manicure can be downright glamorous — think sparkling stilettos, jewel-toned French tips, and firework bursts that look like they belong on a magazine cover (Allure and Byrdie have both run features on this exact trend the past two summers, and it’s only gotten bigger).
In this guide, I’m walking you through ten of the most-loved fourth of july nails designs trending right now, plus how to pick the right style for your hands, how to actually paint these looks at home, and the rookie mistakes that trip up even the most enthusiastic DIYers. Grab your polish — let’s get into it.
How to Choose the Perfect Fourth of July Nail Style
Before you commit to a design, there are a few things worth thinking through. Picking fourth of july nails isn’t just about grabbing the prettiest photo you saw online — it’s about matching the design to your nails, your routine, and your event.
Nail shape matters more than you’d think. Stiletto and almond shapes give you more canvas for detailed flag art or fireworks, while square and oval shapes tend to suit cleaner, geometric stripe-and-star combos. If you’re newer to nail art, rounder shapes are far more forgiving for beginners.
Length is a lifestyle decision. Long coffin or stiletto nails look incredible in photos (and they really do steal the show at a cookout), but if you’re going to be flipping burgers, popping sparklers, or wrangling kids all day, a shorter almond or squoval shape will save you a ton of frustration.
Application method changes everything. Gel polish gives you the longest wear and the glossiest finish — ideal if the holiday falls mid-week and you want your mani to survive the whole weekend. Press-ons are a lifesaver if you’re short on time, since you can pop on a full patriotic set in under twenty minutes. Salon acrylics are the move if you want intricate 3D detailing, rhinestones, or a serious length upgrade for the holiday.
Color theory is sneaky important. Pure red, white, and blue is classic, but adding navy instead of bright blue, or swapping glossy red for a deep matte cherry, instantly makes a design feel more elevated and less “craft store.” A touch of silver glitter or gold jewelry pairs beautifully with almost any patriotic palette too.
Now, let’s get into the actual designs.
Read Also: OMG! These Summer Nails 2026 Trends Are What Every Girl Needs!
Read Also: 10 Stunning Tropical Y2K Outfits You Need to Try This Summer
10 Trending Fourth of July Nails Worth Copying This Year
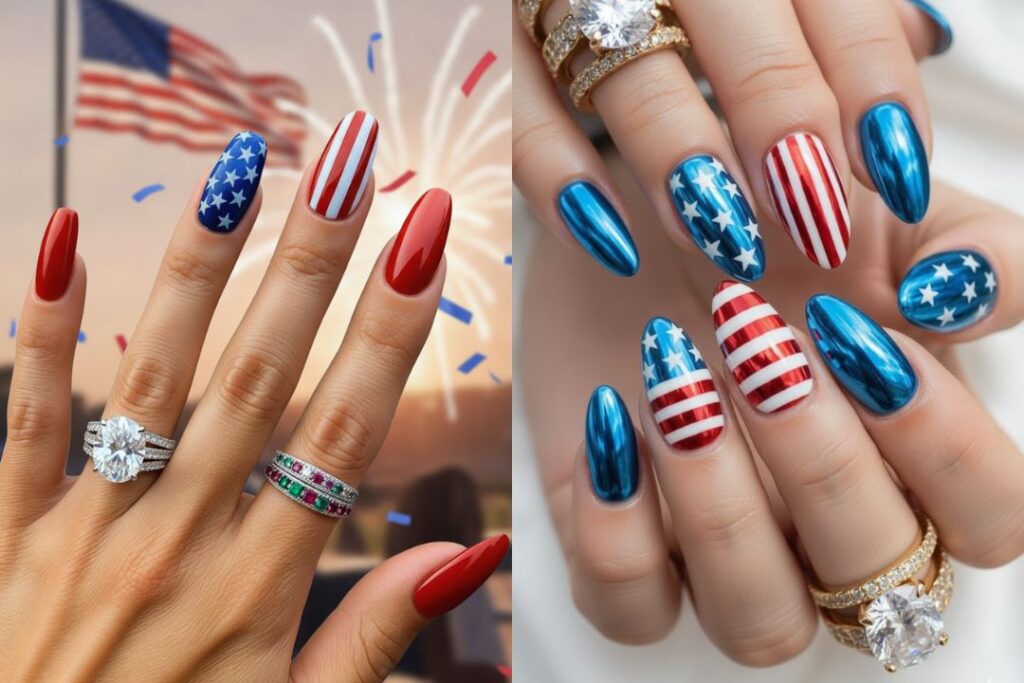
1. Glitter Stiletto Stars & Stripes with a Fireworks Backdrop Fourth of July Nails
This look is pure drama, and it’s easily one of the most photographed fourth of july nails styles out there. Picture long, sharp stiletto nails coated in a shimmering red glitter base, paired with a deep cobalt blue glitter accent nail. What makes this set so eye-catching is the color-blocking — each nail is split horizontally, with a lighter rose-red glitter on top fading into a deeper red glitter below, divided by a crisp white stripe. One nail goes full Americana with a blue star-studded tip melting into red-and-white candy stripes, almost like a mini flag wrapped around the nail.
To recreate this at home, start with a glitter-friendly base coat, then apply your glitter polish in thin layers — patience here is everything, since glitter polish always looks better built up slowly rather than slapped on thick. Use a fine striping brush dipped in white polish for that clean divider line, and finish with a single rhinestone near the cuticle for sparkle that catches the light (and the fireworks) beautifully. A glossy top coat seals in the glitter and keeps those edges from catching on clothing.
2. Classic Flag-Wrap Square Nails
If you want fourth of july nails that read “I tried” without looking overdone, this set nails it (pun intended). Each finger gets its own piece of the puzzle — one nail wears a full waving American flag design wrapped diagonally across the nail bed, another goes solid navy with scattered white stars, a third does red-and-white vertical stripes with a small blue star-block corner, and the pinky returns to a clean, glossy block of stars on navy.
This design works so well because it breaks the flag into “sections” rather than trying to cram the entire flag onto one tiny nail (which almost always looks cluttered). For DIY application, nail decals or water transfer stickers are honestly your best friend here — they give you that crisp, photo-real flag look without needing a steady hand for tiny stripes. If you’re painting freehand, sketch your stripe spacing with a thin white pencil line first so everything stays even before you commit polish to nail.

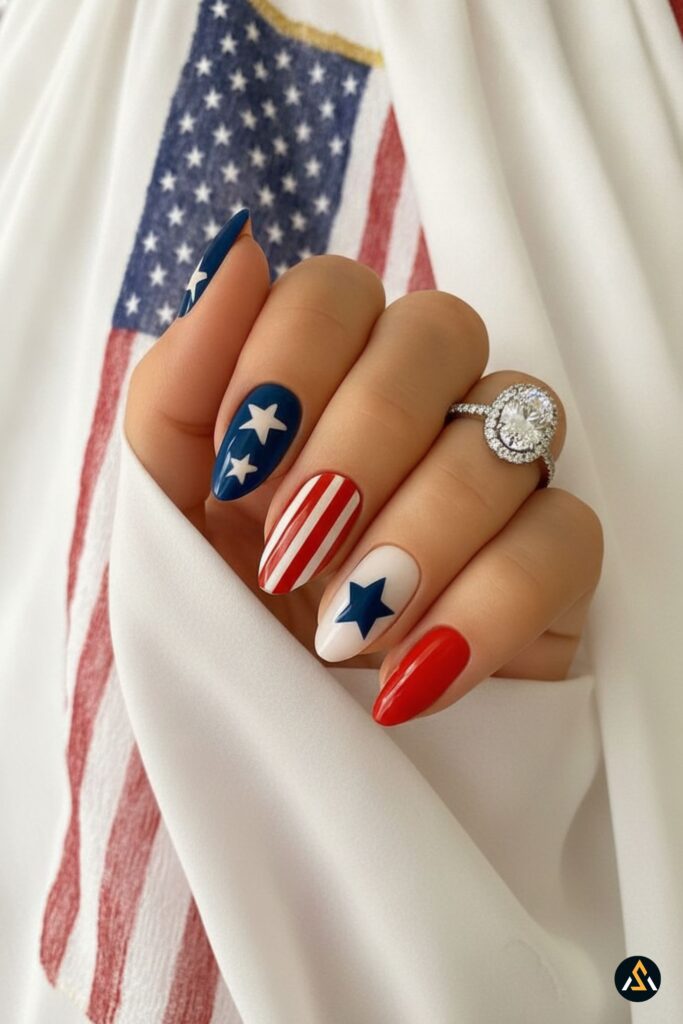
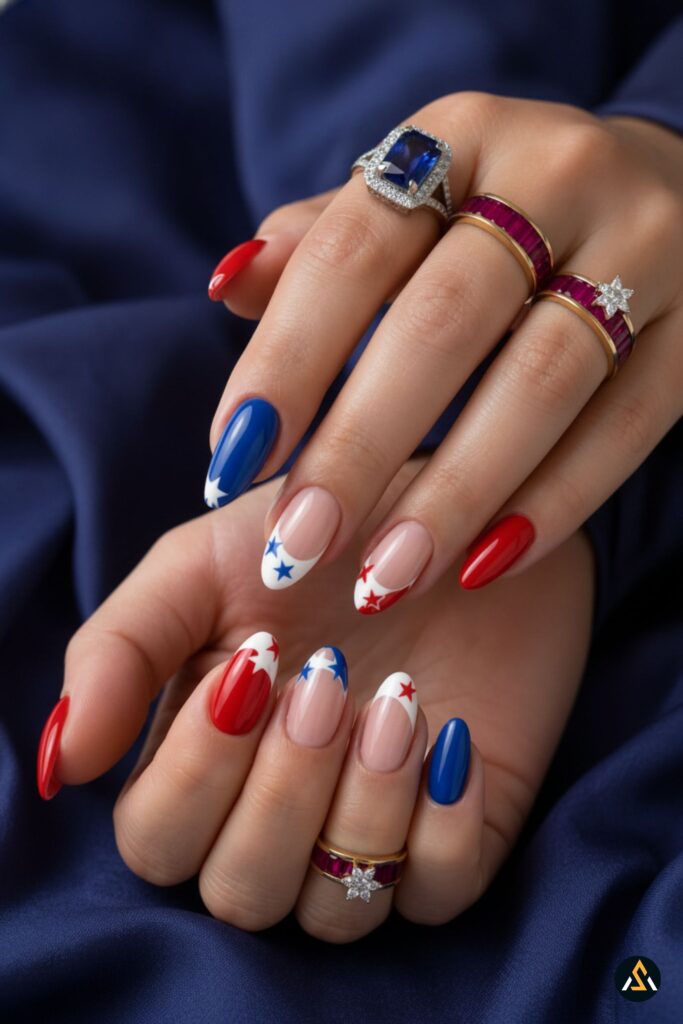
3. Navy Star & Candy Stripe Almond Set
This one leans elegant rather than loud, which makes it a favorite among brides and bridal parties getting married around the holiday. Almond-shaped nails alternate between solid navy with a single oversized white star, crisp red-and-white candy cane stripes on a diagonal, a soft white nail with one small navy star as the focal point, and a few solid glossy red nails to balance everything out.
What I love about this set is the restraint — not every nail is “busy,” which lets the star and stripe nails actually pop instead of competing with each other. For an at-home version, paint your base navy or red first, let it cure completely, then use a striping tape (the thin vinyl kind made for nail art) to mask off your stripe lines before adding the contrasting color. Peel the tape away while the polish is still slightly tacky for the cleanest edge.
4. French Tip Stars Mixed Manicure
French manicures got a serious glow-up this year, and the patriotic version is no exception. Instead of the usual white tip, this design swaps in star-printed tips in alternating navy and red over a sheer, natural pink base. A few accent nails go fully solid — one deep red, one royal blue with a single white star — creating a manicure that feels modern, wearable, and office-appropriate while still celebrating the holiday.
This is genuinely one of the easier looks to DIY because you’re not painting the whole nail. Use a French tip guide sticker to mask the smile line, paint your tip color, then use a small dotting tool or a fine nail art brush to add tiny white stars once the tip color is dry. Because most of the nail stays your natural color, this design also grows out more gracefully than full-coverage manis, which is a nice bonus if you’re not getting a fresh set right before the holiday.
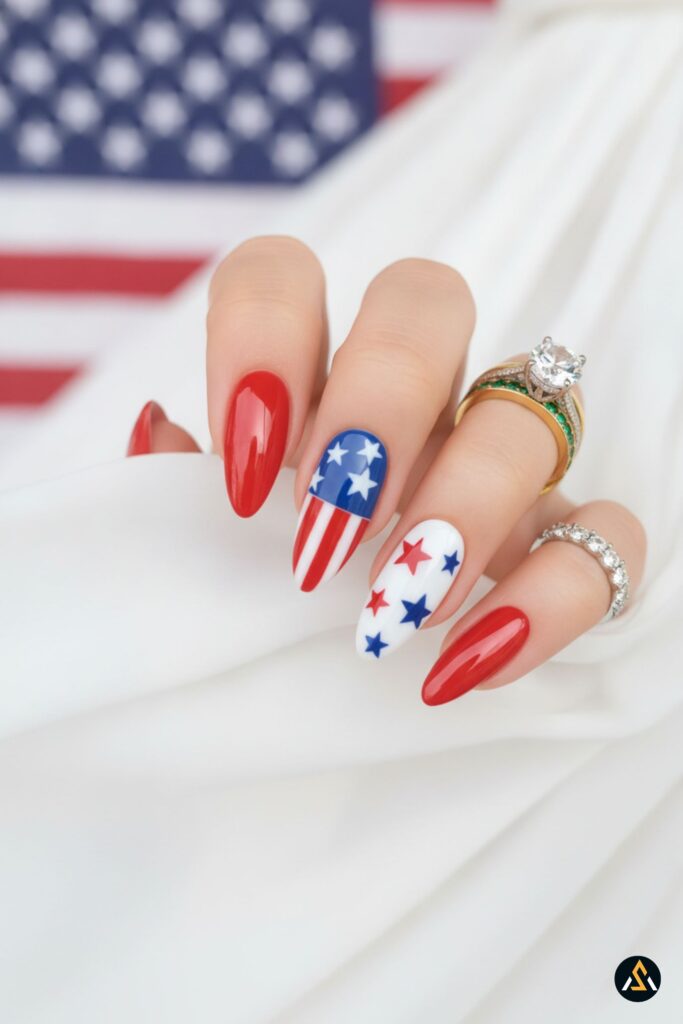
5. Bold Red Glossy with Flag & Star Accents
Sometimes simple really is best, and this set proves it. The majority of the nails are a deep, juicy, glass-like red — the kind of glossy finish that looks expensive even in dim evening light. Just two accent nails carry the patriotic detail: one with a blue-and-white star block melting into red-and-white stripes (a flag silhouette, essentially), and another with a clean white background scattered with small red and blue stars.
This is the design I recommend most to clients who want something festive but don’t want their nails to be the loudest thing in the room. The trick to that glass-nail red finish is layering — two thin coats of a true, slightly blue-based red (avoid orange-leaning reds, they read cheap under flash photography), followed by a high-shine, non-thick top coat. For the star accent nail, a tiny dotting tool with two different sizes gives you that scattered, organic star placement instead of a stiff, too-perfect grid.
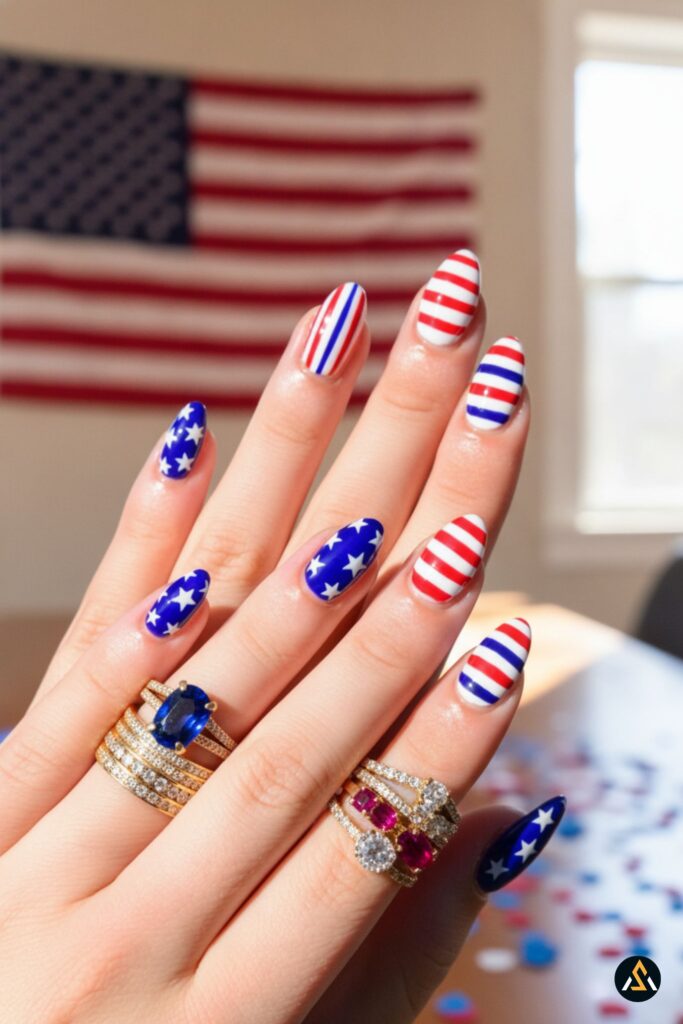
6. Patriotic Stripe & Star Oval Set
This design is a personal favorite of mine because it plays with stripe direction in a way most people don’t think to try. Instead of every nail having the same horizontal or vertical stripes, this set mixes it up — one nail has bold vertical red-white-blue stripes, another goes full candy-cane red and white, two nails are solid navy covered edge-to-edge in white stars, and the remaining nails do thinner red-and-white horizontal stripes that almost look like ribbon.
Oval nails are particularly forgiving for stripe work because the curved tip naturally guides your brush, so even slightly uneven lines tend to look intentional rather than messy. If you’re attempting the all-over star pattern, work in a loose diagonal grid in your head (don’t actually draw it) and vary star size slightly — uniform stars in perfect rows tend to look like wallpaper rather than nail art.
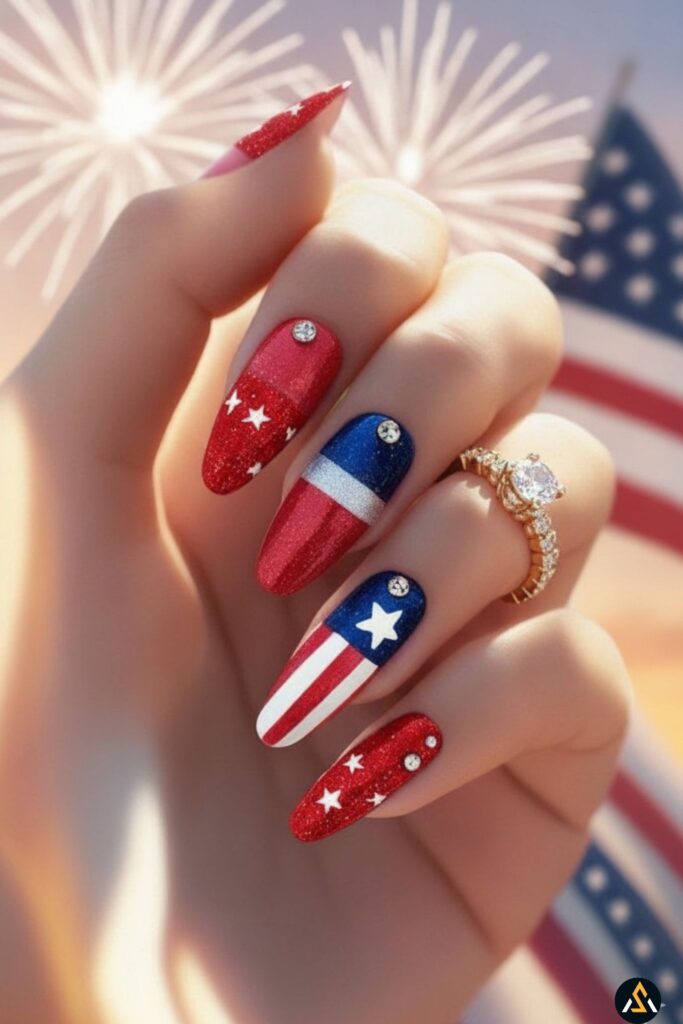
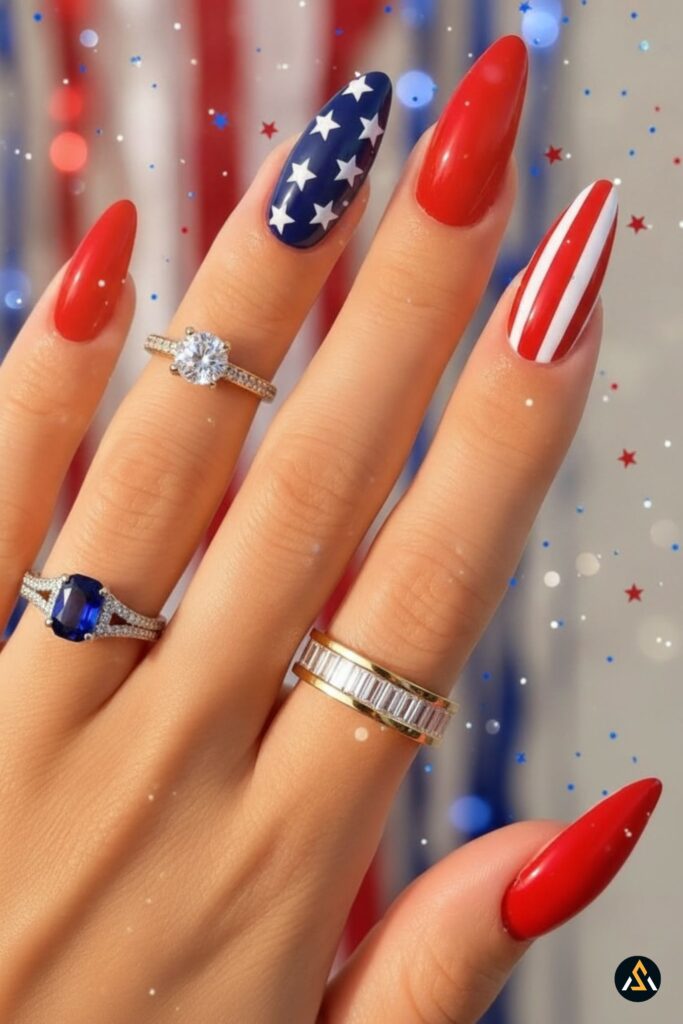
7. Long Stiletto Red, Starry Navy & Stripe Combo
For anyone who wants their fourth of july nails to genuinely command attention from across the yard, this is the set. Dramatic, long stiletto nails in a mix of solid glossy red and a single navy accent nail scattered generously with white stars, plus one striking red-and-white vertical stripe nail for contrast. Set against a backdrop of sparkly bokeh lighting (or, in real life, actual fireworks), this manicure was basically made for nighttime photos.
Stiletto shapes require a bit more nail strength, so if your natural nails are on the thinner side, consider a gel overlay or acrylic extension before attempting this length — it’ll help prevent breakage during a long day of activities. When painting the star nail, start from the cuticle and work toward the tip in a loose scatter, leaving slightly more negative space near the free edge so the stars don’t feel cramped or crowded together.
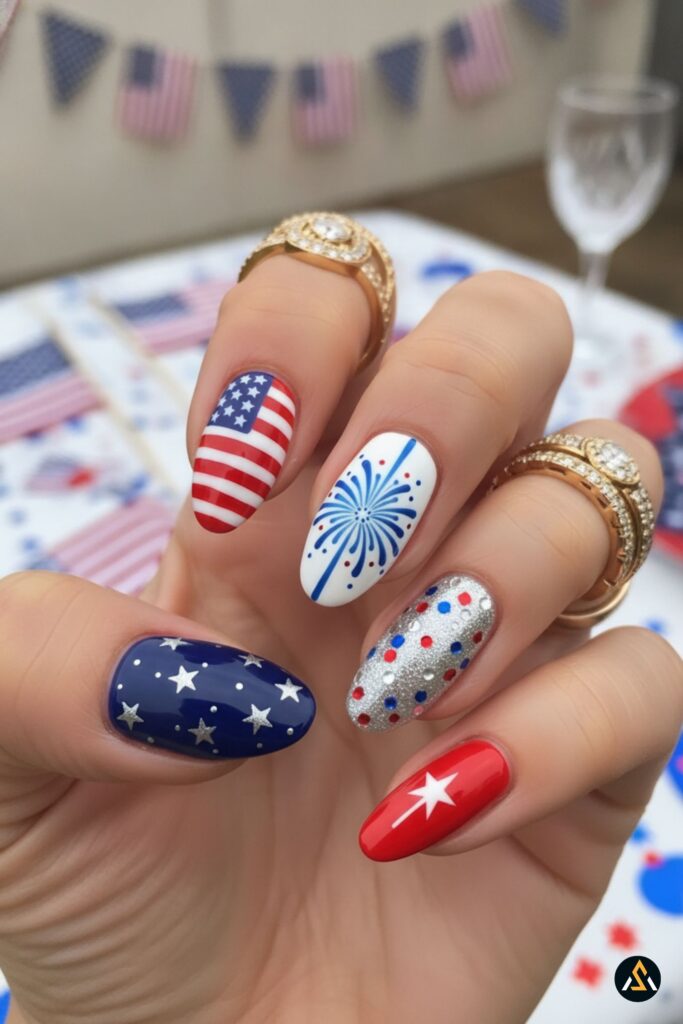
8. Firework Burst & Confetti Glitter Celebration Set
This is, hands down, one of the most requested fourth of july nails designs I’ve done in the last two seasons, and it’s easy to see why. One nail features a full American flag wrap, another shows off a hand-painted blue firework burst exploding across a clean white background, a third is coated in silver glitter studded with tiny red, white, and blue confetti dots, a fourth goes deep navy with scattered silver stars, and the final nail is a bold red with a single white star burst.
The firework nail is the showstopper here, and it’s more approachable than it looks. Start with a white base, then use a fine detail brush to paint thin lines radiating outward from a central point — think of it like drawing a dandelion or a sparkler trail. Add small dots at the end of each line in alternating navy and red to mimic the bursting effect. The confetti glitter nail is even easier: apply a clear base, then while it’s still wet, gently place pre-made confetti-style nail glitter (sold in most beauty supply stores) exactly where you want it before sealing with top coat.
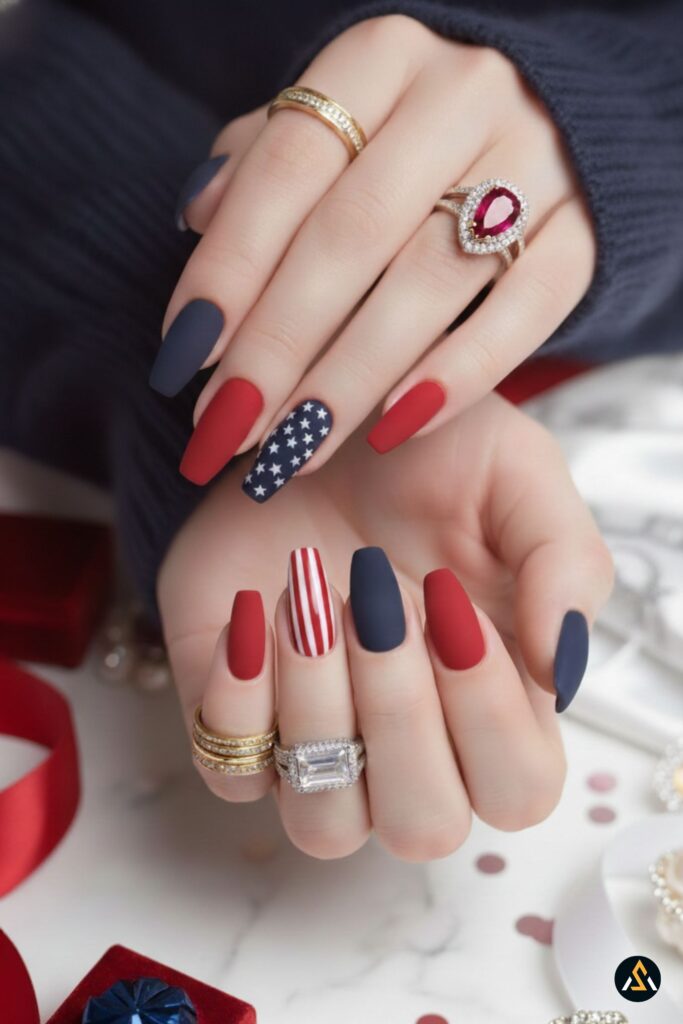
9. Matte Navy & Red Coffin Nails with Flag Accent
Matte finishes have been having a real moment, and this set shows exactly why they work so well for patriotic looks. Long coffin-shaped nails alternate between a velvety matte navy and a rich matte red, with one accent nail breaking the pattern in glossy red-and-white candy stripes and another going matte navy covered in clean white stars. The contrast between the matte background nails and that one glossy striped nail is what makes this set feel intentional rather than accidental.
Matte top coats are sneaky tricky for beginners because they can sometimes look chalky if applied too thick, so the key is one even, thin layer over your fully cured color coat — let it sit untouched for a few minutes since matte top coats often dry faster on the surface than they cure underneath. Coffin shapes also need a bit more filing precision at the corners to avoid looking square instead of tapered, so take your time shaping before you even start painting.
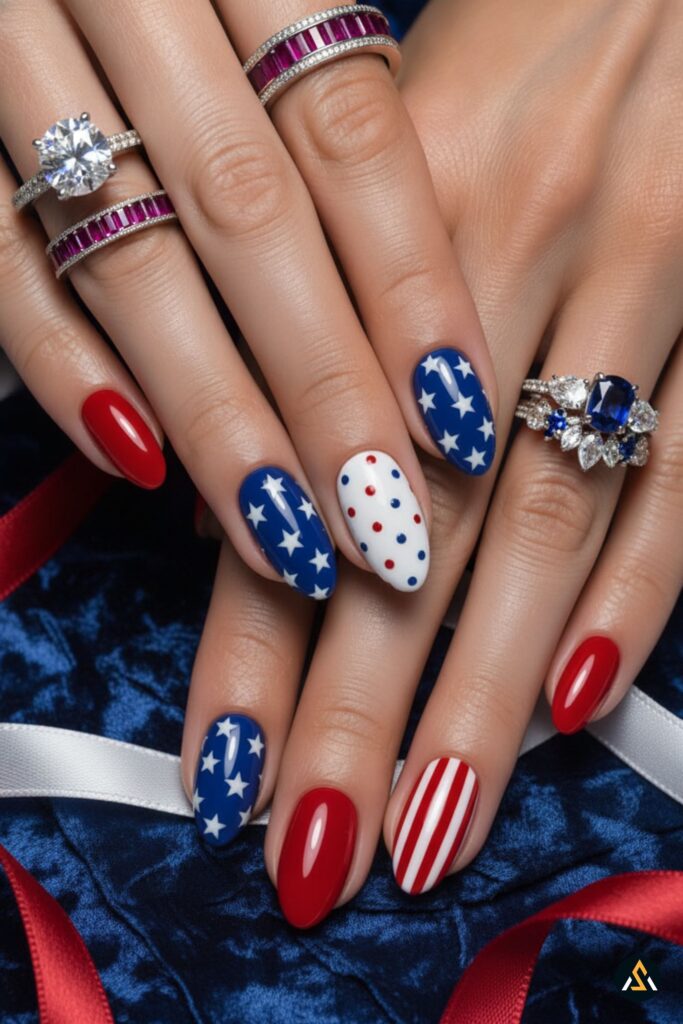
10. Polka Dot & Star Almond Mixed Manicure
Rounding out the list is a set that feels playful without sacrificing elegance. Almond nails mix solid glossy red, navy with crisp white stars, a charming white nail covered in alternating red and navy polka dots, and a candy-stripe red-and-white nail for good measure. The polka dot nail is really the star of this set (no pun intended) — it adds a softer, more whimsical touch compared to the sharper geometry of stars and stripes everywhere else.
Polka dots are one of the most beginner-friendly nail art techniques out there, which makes this a great “starter” patriotic design if you’re newer to DIY nail art. A dotting tool (or honestly, the rounded end of a bobby pin works in a pinch) dipped in polish and pressed straight down — no dragging — gives you those perfectly round dots every time. Alternate your colors and vary the spacing slightly so it feels hand-done rather than stamped from a machine.
DIY Application Tips for Flawless Fourth of July Nails
No matter which of these ten looks calls your name, a few universal techniques will make your life so much easier.
Always start with a clean canvas. Push back your cuticles, lightly buff the nail surface, and wipe with rubbing alcohol before any polish goes on. This one step alone dramatically improves how long your manicure lasts.
Thin coats win every time. It’s tempting to slap on one thick coat and call it done, but thin, even layers dry faster, last longer, and look glossier in the end.
Nail vinyls and striping tape are total game-changers for anyone who doesn’t trust their freehand line work. They’re inexpensive, reusable in some cases, and give you salon-level precision for stripes, chevrons, and even star outlines.
Stamping plates designed specifically for patriotic or star designs can save you tons of time if you’re doing a full set of ten nails and don’t want to hand-paint every single star.
Seal everything with a quality top coat, and reapply it every two to three days if you’re aiming to make your manicure last through an entire holiday weekend of pool days and grilling.
Common Mistakes Beginners Make (and How to Actually Fix Them)
Even the most enthusiastic DIYer runs into a few snags, so here’s what tends to go wrong and how to course-correct.
Smudged stripes or shaky lines. This almost always comes down to rushing or using a brush that’s too thick for fine detail. Switch to a proper striping brush (the long, thin bristled kind), and rest your pinky against the table for stability while painting.
Stars that look more like blobs. Freehand stars are genuinely hard, even for experienced nail techs. Don’t be afraid to lean on star-shaped vinyl stickers or a small stamping plate instead of fighting it out with a brush — there’s zero shame in using tools that make the job easier.
Glitter that looks clumpy or uneven. This usually happens when too much polish is applied in one go. Dab your brush gently rather than dragging it, and always apply glitter in thin, built-up layers rather than one heavy coat.
Chipping before the big day even arrives. This is almost always a prep issue — skipping the base coat, not letting layers dry fully between coats, or skipping the top coat altogether. Cap the free edge (the very tip of the nail) with every single layer of polish, since that’s the area that takes the most daily wear.
Designs that feel cluttered. When in doubt, less is more. Pick one or two “statement” nails per hand and keep the rest simple — solid colors or subtle stripes — so your standout design actually gets to shine.
How Long Will Your Fourth of July Manicure Last?
With proper prep and a solid top coat, gel-based fourth of july nails typically hold up for two to three weeks, while regular polish sets usually last about five to seven days before chipping becomes noticeable. Press-on sets, surprisingly, can last just as long as gel if applied correctly with proper adhesive and nail prep — they’ve come a long way from the flimsy drugstore versions of years past.
Final Thoughts
At the end of the day, the best fourth of july nails are the ones that make you feel confident and festive, whether that’s a subtle French tip with tiny stars or a full glittery stiletto set with fireworks dancing across your fingertips. Pick a design that fits your nail shape, your schedule, and how loud (or quiet) you want your holiday spirit to be — and don’t stress over perfection. Some of the prettiest patriotic manicures I’ve ever done had a slightly wobbly stripe or two, and honestly? Nobody at the barbecue is going to notice but you.
Happy Fourth of July, and happy painting!