Is your wardrobe transitioning to cozy knits and rich, warming hues, but your manicure is still clinging to the last vestiges of summer? Let’s be real, a neon pink just doesn’t hit the same when you’re sipping a peppermint latte. Just as you carefully choose the perfect winter outfit—layering textures, playing with fabrics, and embracing deeper palettes—your winter nails deserve a seasonal refresh that captures the magic and mood of the colder months.
Think of it like this: how do you choose the perfect winter outfit? You consider the feel of a chunky cable-knit, the drama of a deep burgundy, the crispness of a white collared shirt peeking out. Your manicure should follow the same principles! We’re moving beyond the bright, sun-bleached shades of summer and diving into a world of deep jewel tones, shimmering metallics, and intricate designs that reflect everything from a frosty morning to a festive soirée.
With over a decade spent behind the nail art brush, I’ve seen trends come and go, but the creativity of winter nails remains a constant source of inspiration. This season is all about expression, and I’ve curated the 12 most captivating designs that are not only stunning but also wonderfully versatile. Whether you’re a DIY devotee or just looking for the perfect picture to bring to your nail tech, this guide is your ultimate resource for stunning winter nail art.
Laying the Groundwork: Prepping for the Perfect Winter Manicure
Before we dive into the dazzling designs, let’s talk foundation. The dry, cold air is brutal on our hands and nails, so a little extra prep goes a long way.
- Hydration is Key: Your new best friend? Cuticle oil. Applying it daily is the single most effective way to combat the brittleness that winter brings. A well-moisturized nail bed also helps polish adhere better, preventing chips.
- Shape Your Canvas: The shape of your nail can significantly alter the overall vibe of a design. For these winter nail ideas, consider an almond shape for timeless elegance, a coffin shape for modern drama, or a classic square oval for durability.
- The Pro’s Product Picks: To achieve these looks, especially at home, arm yourself with a strong base coat, high-quality polishes (gels are fantastic for longevity), a no-wipe top coat for chrome looks, and a set of fine-detail brushes. Trust me, the right tools make all the difference.
The 12 Must-Try Winter Nail Ideas: Your Ultimate Guide
Alright, let’s get to the main event! Here is your detailed guide to the season’s most sought-after winter nail designs.
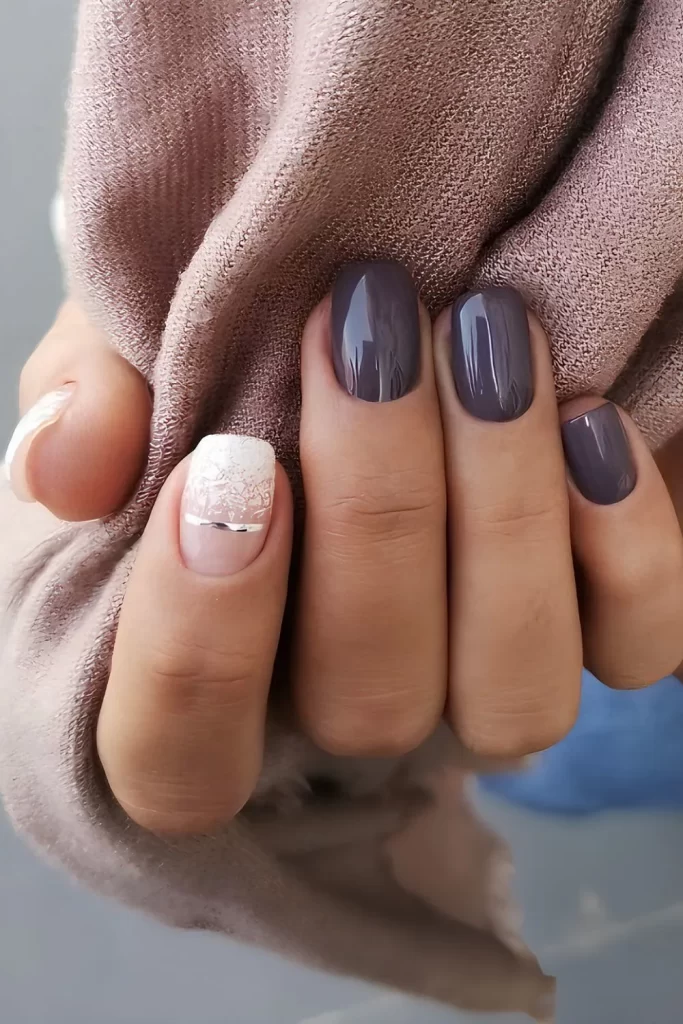
1. The Timeless Winter Classic: Reimagined French Tips
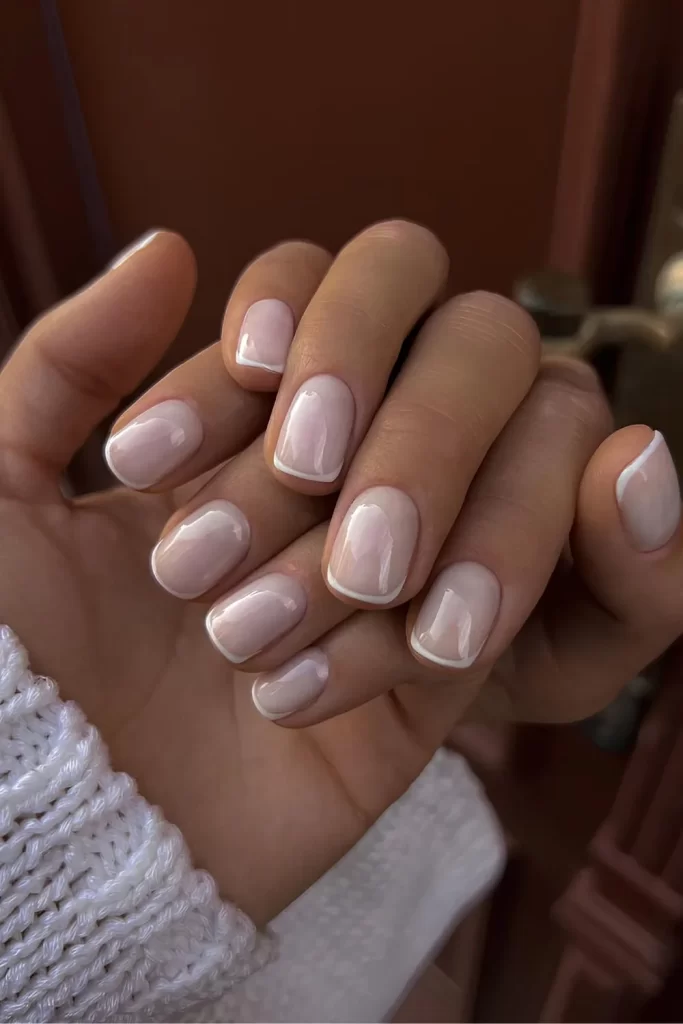
Forget what you think you know about French manicures. This winter, we’re throwing the rulebook out the frozen window. The classic French tip is getting a seasonal makeover that’s anything but basic.
The In-Depth Tutorial:
The secret to a modern French tip lies in the color combination. Instead of a stark white on a pink base, let’s play with the palette of the season. Start with a sheer, milky nude or a soft blush base coat—this gives a clean, “your nails but better” effect. Now, for the star of the show: the tip. Using a steady hand or even French tip guides, paint the tips with a shimmery silver, a frosty blue, or a deep burgundy. The effect is instantly more sophisticated and cool-weather appropriate. For the truly adventurous, try a metallic gold tip on a transparent base for a touch of understated holiday glam. The goal is that elegant elongation, but with a whisper of wintery wonder.
A Common Mistake & The Fix:
Mistake: Creating tips that are too thick or using a color that clashes with the base, making it look harsh.
Fix: If you’re freehanding, rest your painting hand on a table for stability. Practice makes perfect! Also, ensure your tip color has a similar undertone (warm or cool) to your base color for a more harmonious look.
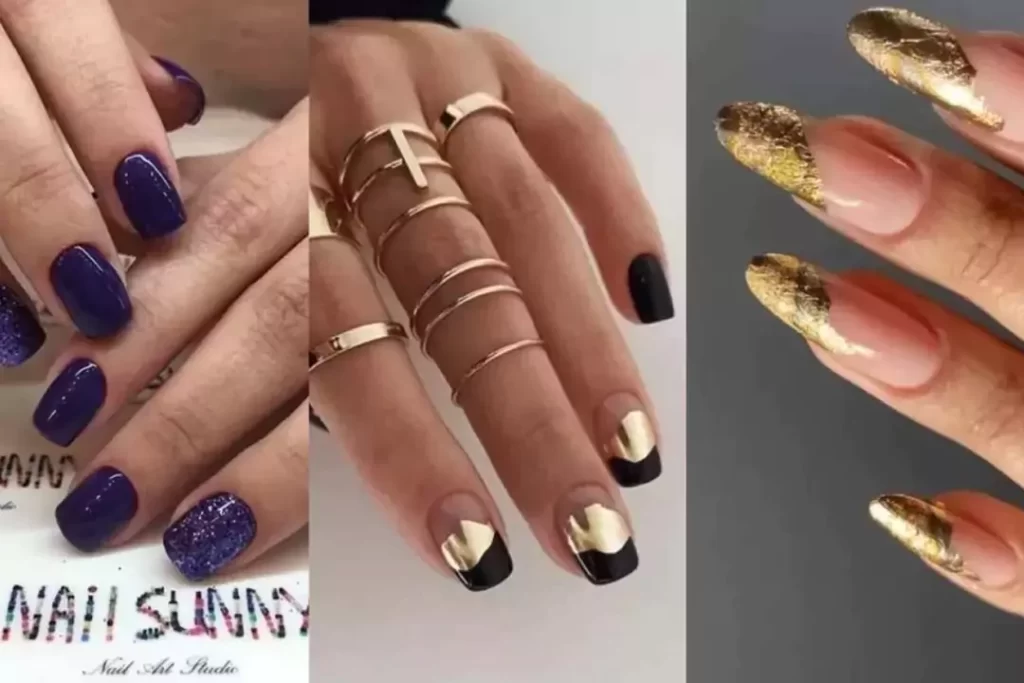
2. The Bold & Dramatic: Black & Red Winter Nails
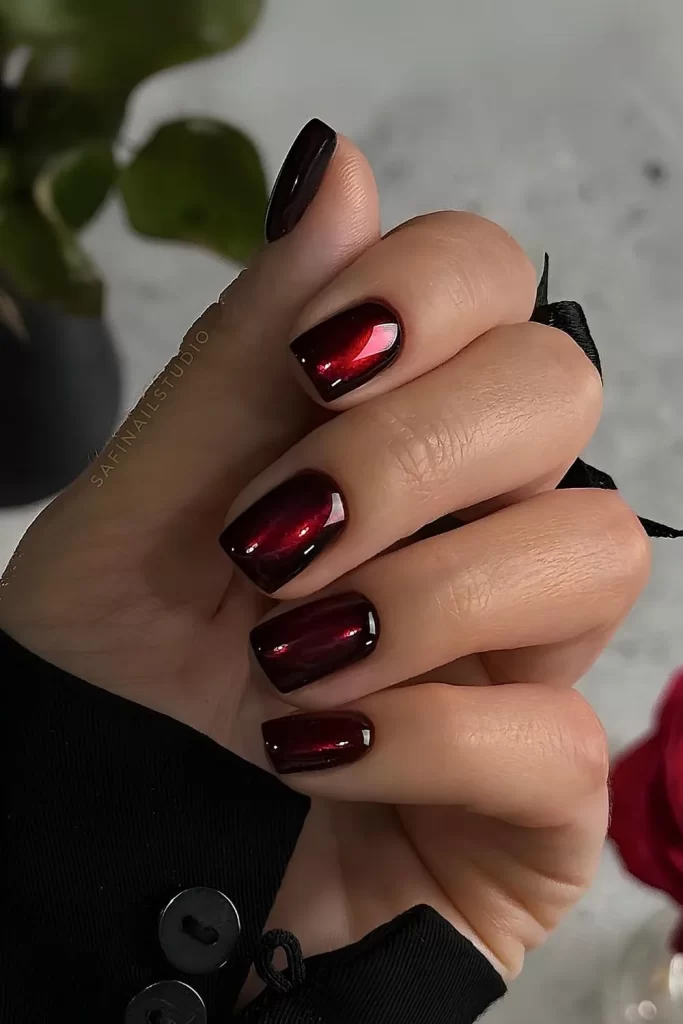
Powerful, confident, and undeniably chic, the combination of black and red is a winter nail staple for a reason. It’s the visual equivalent of a little black dress with a bold red lip—timeless yet fiercely modern.
The In-Depth Tutorial:
Don’t just settle for alternating colors on each nail. The real artistry here is in the composition. For a truly show-stopping look, try a glossy black base on all nails. Then, on your ring finger or accent nail, use a fine detail brush to create a single, perfect blood-red swirl or teardrop shape. Another stunning option is a diagonal design, where the nail is split diagonally between a cream red and a jet black. If you’re using gel polish, you can cure the first color, use nail tape to create a sharp line, and then apply the second color. This combo is all about high contrast and sleek execution.
A Common Mistake & The Fix:
Mistake: The red and black are bleeding into each other, creating a muddy line.
Fix: If you’re painting freehand, make sure your first color is completely, bone-dry before applying the second. For gel users, a no-wipe top coat cured between colors will create a sealed canvas for your next layer.
3. The Cozy Classic: Fair Isle Pattern Winter Nails
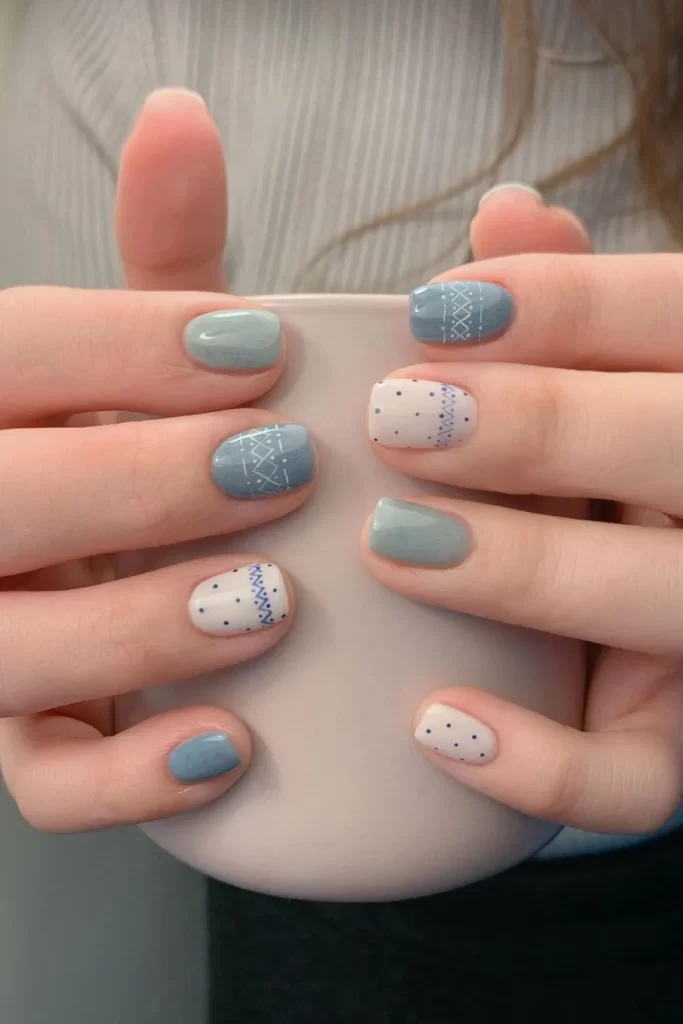
Ready to bring the cozy charm of your favorite Nordic sweater right to your fingertips? Fair Isle patterns are the epitome of whimsical, hygge-inspired winter nail art. It looks intricate, but with a little patience, it’s absolutely achievable.
The In-Depth Tutorial:
Start with a creamy, off-white or a deep navy base color—this is your “sweater.” Let it dry completely. Now, using a very thin nail art brush or even a dotting tool, begin building your pattern. Start with simple elements: small dots in a line, tiny “X” shapes, and little hearts. The key is to use a traditional winter color palette: think crimson, forest green, navy, and cream. Don’t try to overcrowd the nail; negative space is your friend. If you’re feeling unsure, nail stamping is a fantastic cheat code for achieving perfect, intricate patterns with ease. Finish the look with a matte top coat; this is the pro-trick that makes the design look and feel like a real knitted fabric.
A Common Mistake & The Fix:
Mistake: Using a brush that’s too thick, resulting in blobby, unclear patterns.
Fix: Invest in a set of fine-line nail art brushes. If you don’t have one, you can actually sharpen a toothpick to a fine point for tiny dots and details.
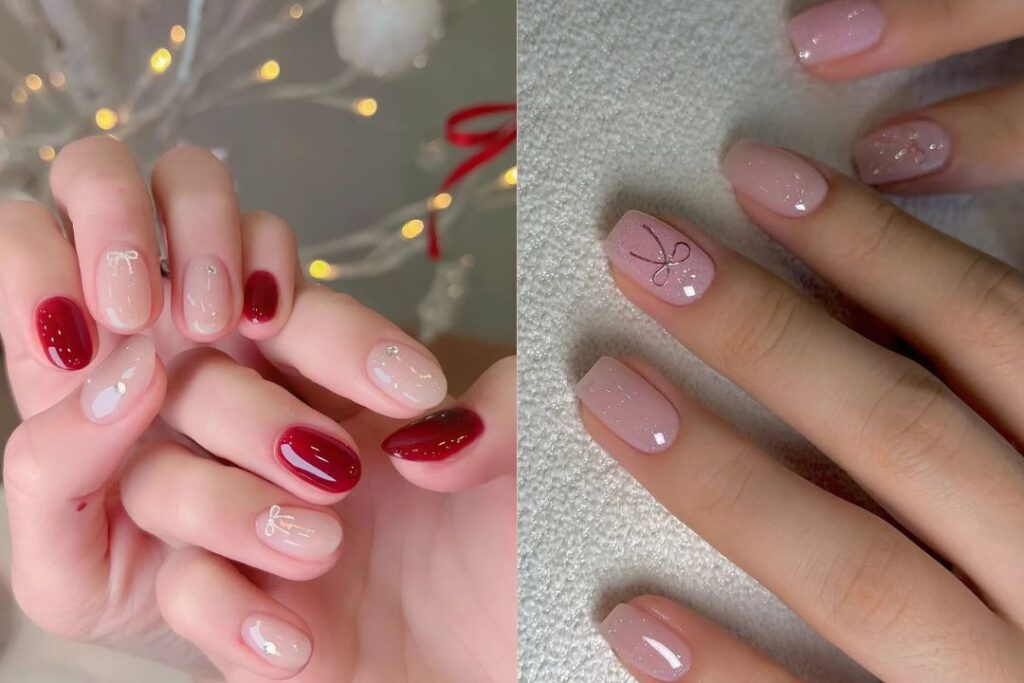
4. The Romantic: Pink Coquette Winter Nails
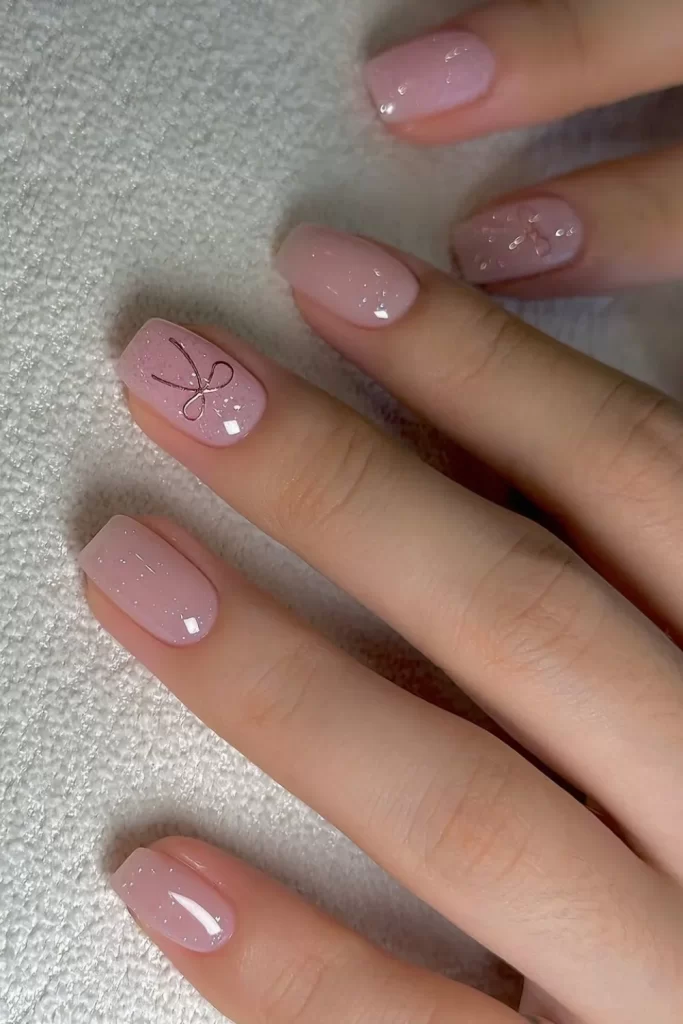
Soft, feminine, and delightfully playful, the Pink Coquette aesthetic is sweeping social media, and it translates beautifully into winter nail designs. This isn’t a summery hot pink; it’s a softer, more delicate, almost frost-kissed romance.
The In-Depth Tutorial:
The foundation of this look is a sheer, milky pink jelly polish. It provides a soft, translucent base that is the hallmark of this style. Once you have your base, the magic is in the 3D details. Using nail glue, carefully place tiny pearl beads or small heart-shaped charms near your cuticle line or on the side of the nail. For a lace effect, you can use a thin white polish and a detail brush to create delicate scrolls, or better yet, use a lace-themed nail stamping plate for flawless results. The overall effect should be soft, dreamy, and incredibly tactile.
A Common Mistake & The Fix:
Mistake: Overloading the nail with too many charms, making it impractical for daily life.
Fix: Less is more. One or two small pearls or a single, delicate lace accent nail is often all you need to capture the vibe without compromising functionality.
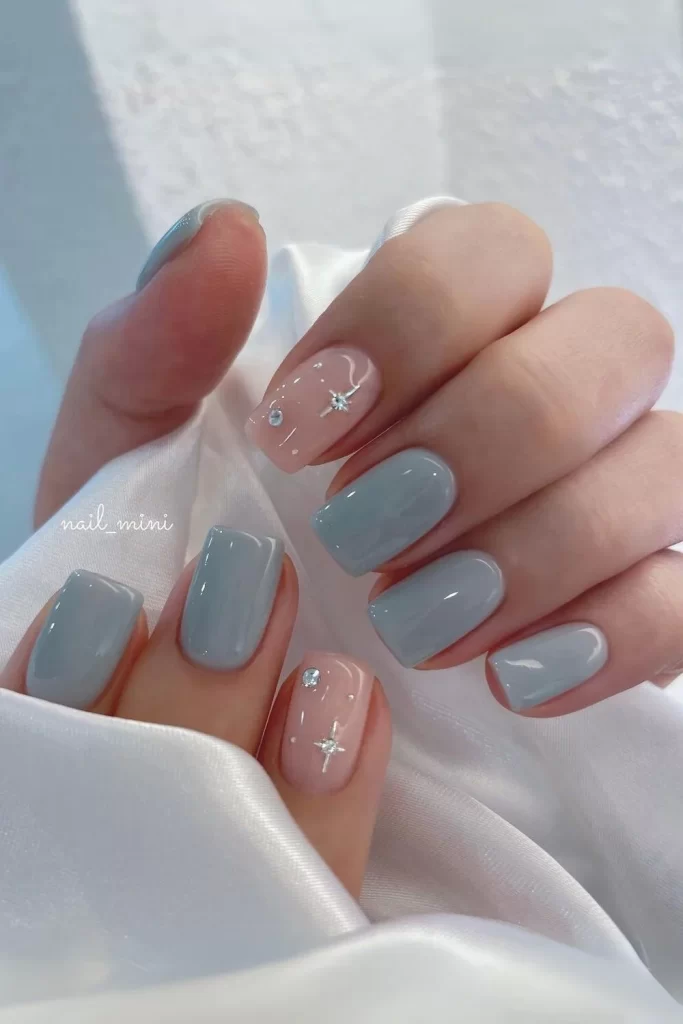
5. The Modern Minimalist: Neutral Chrome Winter Nails
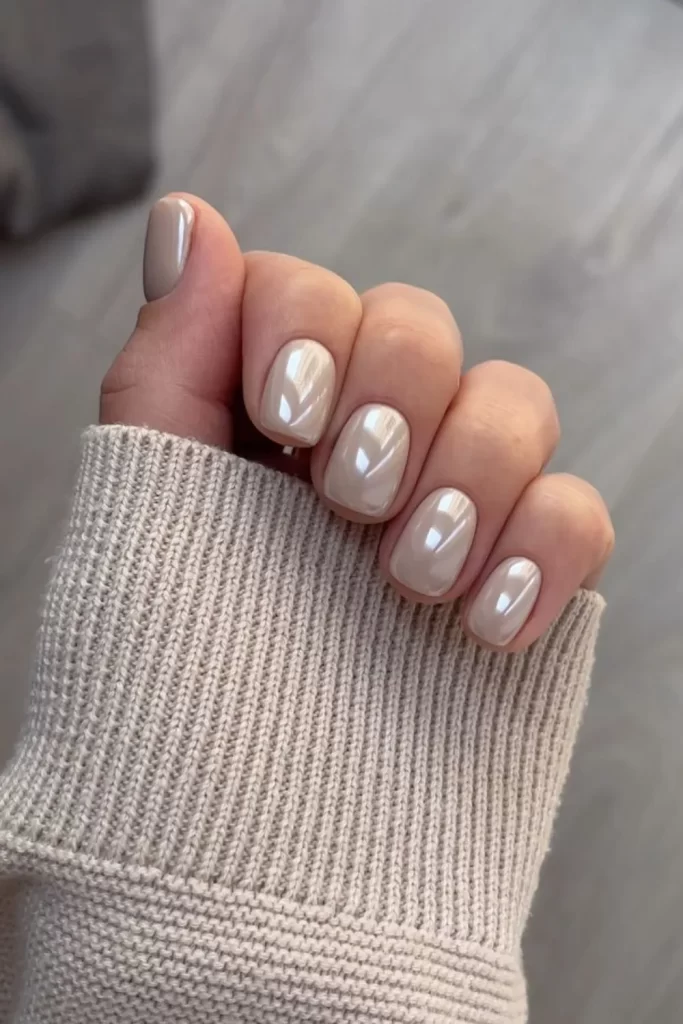
If you love a sleek, futuristic look that still feels incredibly sophisticated, neutral chrome is your go-to. This style captures the essence of a frosty morning with a high-fashion twist, making it one of the most sought-after winter nail trends.
The In-Depth Tutorial:
This is a gel-polish technique. The most critical step is the base color. For a true silver chrome, apply two coats of a light grey or a beige gel polish and cure. For a rose gold chrome, use a soft pink base. After your final color coat, apply a no-wipe top coat, cure it under the LED/Lamp, and then you’re ready for the transformation. Using a silicone applicator or your finger (wrapped in a plastic wrap), gently rub the chrome powder over the entire nail surface. You’ll see the magic happen instantly, turning the dull matte powder into a brilliant, reflective metal. Buff it until it’s perfectly smooth and mirror-like, then seal everything with a final layer of top coat.
A Common Mistake & The Fix:
Mistake: Using a regular top coat before the chrome powder, which won’t work. Or, applying the powder before the top coat is cured.
Fix: You must use a “no-wipe” top coat. A sticky inhibition layer is necessary for the powder to adhere. Always cure your top coat fully before moving on to the powder step.
6. The Festive Favorite: Red & White Winter Nails
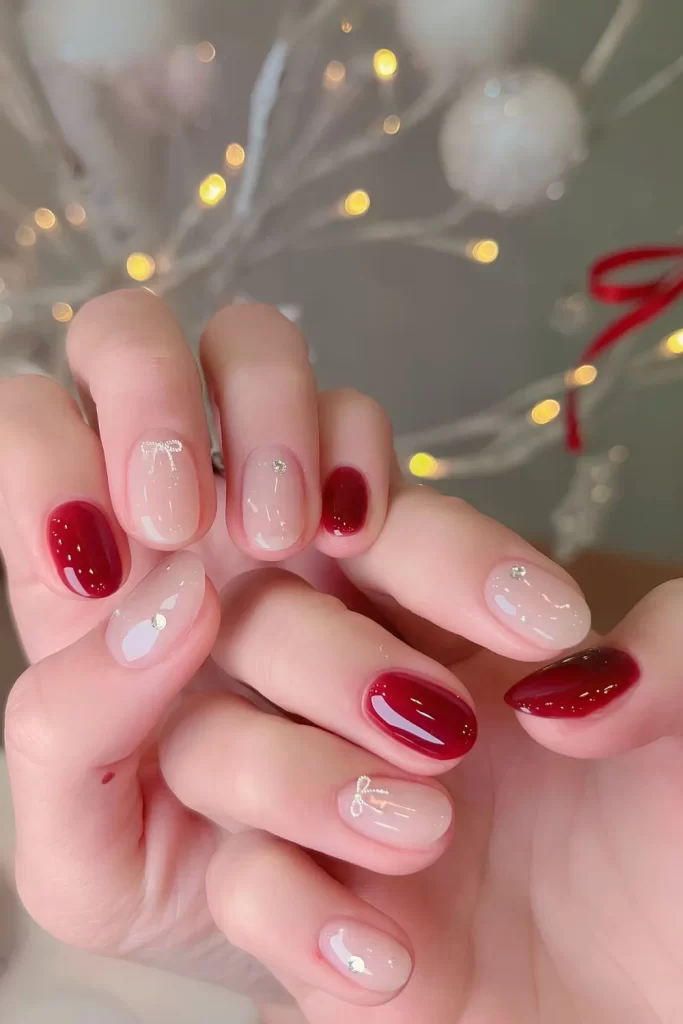
This combination is pure, unadulterated joy. It’s the candy cane, the Santa suit, the retro kitchen wallpaper of your dreams—all bottled up into a fantastically festive winter nail art concept.
The In-Depth Tutorial:
Let’s think beyond simple stripes. How about a deep crimson red base on all nails with a single, crisp white accent nail featuring a delicate red snowflake? Or, try a reverse French tip where the white tip is on the bottom of the nail (the lunula style) for a truly unique twist. For a more graphic, modern look, use nail vinyls to create clean checkerboard patterns on an accent nail. The key is to play with the balance. An all-over design can be loud and fun, while strategic accents on a neutral base feel more chic and intentional.
A Common Mistake & The Fix:
Mistake: Streaky, uneven white polish.
Fix: White polish is notoriously difficult. The solution is thin, even coats. Don’t try to get full coverage in one go. Apply a thin first coat, let it dry completely, and then apply your second coat. A third might be necessary for perfect opacity.
7. The Frost Queen: Icy Blue Winter Nails
Capture the serene, majestic beauty of a frozen landscape with an icy blue manicure. This look is ethereal, cool-toned, and has an almost magical quality to it, perfect for those who want their winter nails to tell a story.
The In-Depth Tutorial:
The secret to a believable “ice” effect is layering. Start with a base of the palest blue you can find. Once that’s dry, take a makeup sponge and dab a slightly darker, shimmering blue onto the tips, creating a soft ombre effect. While the polish is still a bit tacky, immediately sprinkle on some iridescent glitter or silver holographic flakes to mimic the way light catches on frost. Finish with a thick, high-gloss top coat to create the illusion of a smooth, frozen surface. This design is all about creating depth and sparkle.
A Common Mistake & The Fix:
Mistake: Using colors that are too dark, which can look more like a summer sky than winter ice.
Fix: Stick to a palette of very light, pastel blues, silvers, and transparent glitters. The goal is a whisper of color, not a bold statement.
8. The Juicy Jewel: Cherry Chrome Winter Nails
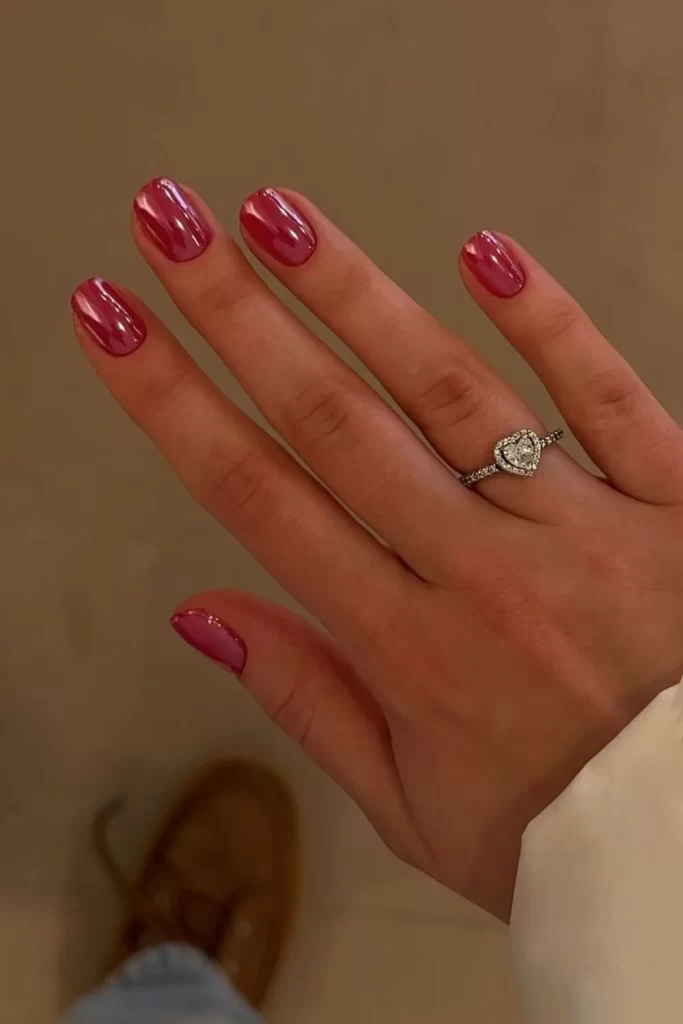
If you love the high shine of chrome but want a dose of deep, decadent color, cherry chrome is your answer. It’s glamorous, juicy, and looks like you’ve just dipped your nails in liquid rubies.
The In-Depth Tutorial:
This follows the same technical process as the neutral chrome, but the base color is everything. For the most intense, reflective, and deep “cherry” effect, you want to use a black-red cream gel polish as your base. After applying your no-wipe top coat and curing, rub a deep red chrome powder over the nail. The dark base makes the red chrome incredibly rich and prevents it from looking pink or too bright. The final result is a hypnotic, wet-looking finish that is pure luxury.
A Common Mistake & The Fix:
Mistake: Using a light or pink-based red for the base, resulting in a less dramatic, more candy-apple finish.
Fix: Commit to the darkness! A black-red or even a pure black base will make the red chrome powder pop with unparalleled intensity.
9. The Ultimate Edge: Black Winter Nails
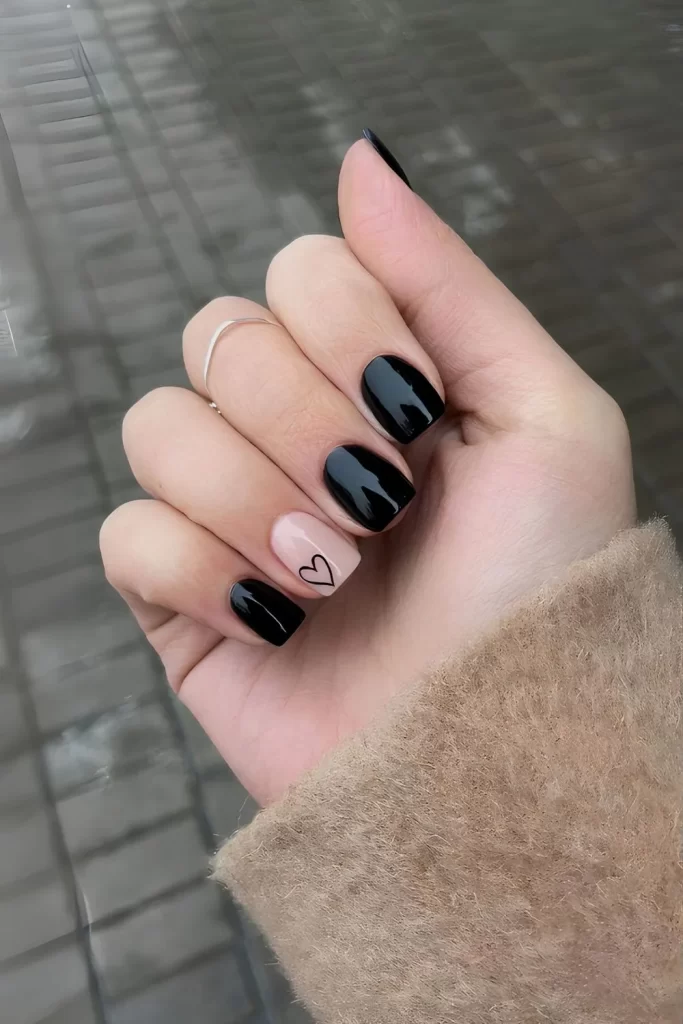
Never underestimate the power of a perfect black manicure. It’s mysterious, powerful, and forever chic. For your winter nails, it provides the perfect dark canvas to play with texture and subtle detail.
The In-Depth Tutorial:
A high-gloss black is a timeless classic, but let’s winterize it. After applying two coats of a rich, jet-black cream polish, consider your finish. A matte top coat instantly makes it modern, edgy, and velvety. For a winter twist, before you apply your top coat, add a single accent nail where you press very fine silver shards or scattered holographic glitter into the polish. This creates the effect of a starry winter night sky. It’s a simple way to add a touch of seasonal magic to the darkest shade of all.
A Common Mistake & The Fix:
Mistake: Streaky, uneven black polish that requires four+ coats.
Fix: Invest in a high-quality, highly pigmented black polish. A good one will be opaque in two smooth, thin coats. Look for brands known for their creme formulas.
10. The Sweet Shimmer: Pink Chrome Winter Nails
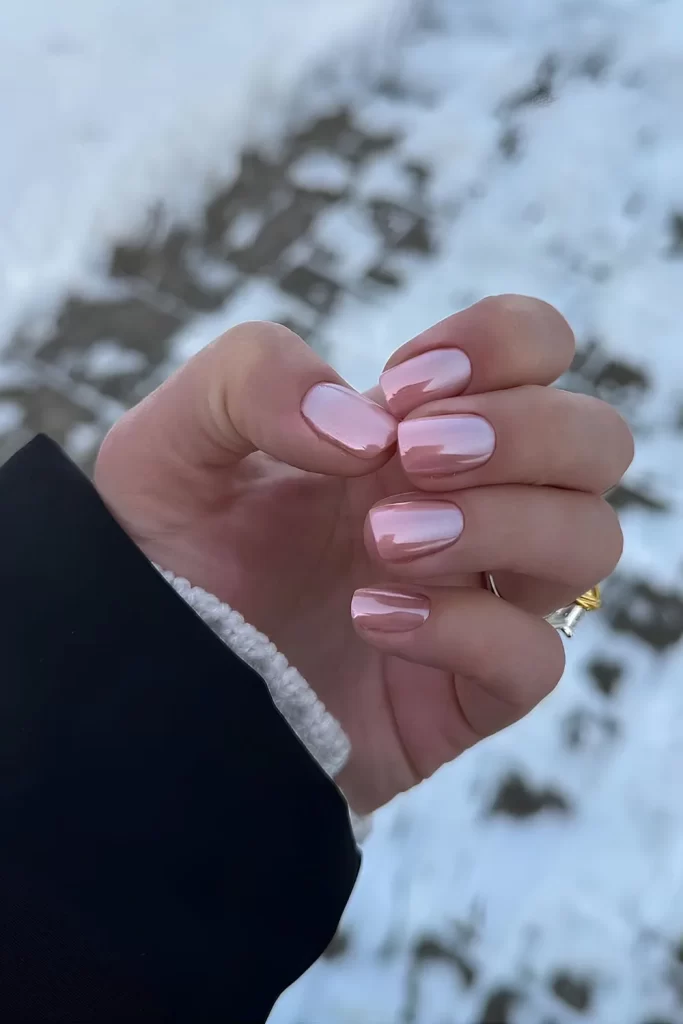
Blending the femininity of pink with the futuristic shine of chrome, this look is for those who love a bit of sweetness with a whole lot of tech. It’s the Pink Coquette’s cooler, more sophisticated sister.
The In-Depth Tutorial:
The fun here is in the customization. The base color you choose will dramatically alter the final chrome result. A pure white base will give you a very light, silvery-pink chrome. A nude-pink base will result in a warmer, rose-gold effect. Follow the same gel and no-wipe top coat process as before, but this time, rub a pink chrome powder over the top. The way the light catches the pink and silver simultaneously is truly mesmerizing and feels incredibly fresh for the season.
A Common Mistake & The Fix:
Mistake: The chrome powder not sticking evenly, leaving patchy spots.
Fix: Ensure you’ve applied a thick enough layer of your no-wipe top coat and that you’re rubbing the powder in thoroughly, using enough pressure to heat and activate the powder.
11. The Artistic Touch: Swirl Design Winter Nails

Whimsical, 70s-inspired, and uniquely yours, a swirl design is pure artistic expression on a tiny canvas. No two swirls will ever be identical, making your winter nail art truly one-of-a-kind.
The In-Depth Tutorial:
This technique, often called a “smudge” or “cloud” manicure, is best done with a bit of patience. Paint your base nail with your lighter color (e.g., white or pale blue) and let it dry completely. Then, add a drop of your second color (e.g., a contrasting navy or red) directly onto the nail. While it is still very wet, use a thin nail art brush or a toothpick to gently swirl the two colors together. You have to work relatively quickly before the polish begins to set. The goal is soft, marbled transitions, not a muddy mix. Using a water-based top coat can give you more time to play with the design.
A Common Mistake & The Fix:
Mistake: Swirling with colors that have already started to dry, resulting in dragging and streaks instead of smooth swirls.
Fix: Work on one nail at a time. Apply your second color and immediately begin swirling. Don’t try to do multiple nails at once.
12. The Winter Wonderland: Snowy Mani
This is the ultimate statement manicure for the season. It’s a textural, detailed landscape right on your nails, capturing the quiet beauty of a snowfall.
The In-Depth Tutorial:
This is an advanced look, but so rewarding. Start by creating a soft ombre sky on your nails, using a sponge to blend from a deep midnight blue at the cuticle to a lighter grey at the tip. Once that’s dry, use a fan brush dipped in white polish to lightly flick across the nail, creating a gentle snowfall effect. For the trees and snowflakes, a stamping plate is your most reliable tool for crisp, detailed images. Finally, to create the illusion of piled snow, take a thick, textured snow-effect polish or a white acrylic paint and dab it along the tips of your nails, creating an uneven, 3D ridge. Seal everything with a top coat, though be aware a glossy coat will flatten the textured snow.
A Common Mistake & The Fix:
Mistake: Overcomplicating the design and making it look messy.
Fix: Focus on one or two techniques. Maybe just the ombre sky and stamped snowflakes, or just the fan-brush snowfall. A minimalist winter landscape can be just as impactful as a detailed one.
Seal the Deal: Pro Tips for Long-Lasting Winter Nails
To ensure your beautiful winter nail designs last as long as possible, remember these final tips:
- Glove Up: Always wear gloves when doing dishes, cleaning, or braving the cold outdoors. This protects your polish from water, chemicals, and temperature shocks that can cause lifting and chipping.
- Oil, Oil, Oil: I can’t say it enough. Keep that cuticle oil handy and apply it around the edges of your polish every day. It keeps your nails flexible and healthy.
- Wrap the Tip: When applying your polish and top coat, make sure to swipe the brush along the very edge of your free nail tip. This “wrapping” seals the color and dramatically prevents the polish from chipping prematurely.
Your nails are your most accessible accessory, and this winter, they have the potential to be absolutely show-stopping. So, which of these winter nail ideas has captured your imagination? Are you leaning towards the dramatic intensity of Cherry Chrome or the cozy charm of a Fair Isle pattern? Whatever you choose, wear it with confidence and let your fingertips do the talking this season